2:12 ISO and Shutter Speed
Hello everyone and welcome to Week Two of the 12 week photo course, which focuses on ISO and Shutter Speed. Hopefully you have joined in this week. If not, it's not too late. You can find the assignment for Week Two HERE. Also, if you want to catch up, the pdf for Week One is here and you can still link up for the assignment over at Twenty-Six To Life. <---- click there to get to the week one link up! Click HERE to go to her site for this week's link up!
This week the question was: When should I use a faster shutter speed?
I often shoot in Shutter Priority (the little S) Mode, since it allows me to manipulate the light by changing the shutter speed and ISO. However, I always need extra tips and it was nice to go through step by step instead of just playing around with it when I am trying to take important photos!
Our assignment was to put an object (I used a glass) in the sink under running water and try changing your shutter speed (and consequently your ISO) in order to see what happens. Here is what I ended up with. Excuse the quality, or lack of it.
So, what I have decided is that I need more practice, especially with moving objects, as the shutter speed will change a lot when the movement changes a lot.
This week the question was: When should I use a faster shutter speed?
I often shoot in Shutter Priority (the little S) Mode, since it allows me to manipulate the light by changing the shutter speed and ISO. However, I always need extra tips and it was nice to go through step by step instead of just playing around with it when I am trying to take important photos!
Our assignment was to put an object (I used a glass) in the sink under running water and try changing your shutter speed (and consequently your ISO) in order to see what happens. Here is what I ended up with. Excuse the quality, or lack of it.
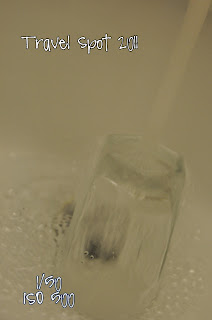
For the first photo, I used a slow shutter, which gives the water a silky effect. However, the light was hard to control. If I upped the ISO, it was too bright, but as you can see, this one is not really light enough.
The second. Better light, not so silky water. You can start to see the bubbles, which means the higher shutter speed is stopping the motion a little.
Here we have a faster shutter speed, which means you have to put the ISO up even more or else you don't get enough light in that little bit of time. Notice the bubbles are more pronounced.
In this last one, you can see the individual water drops. However, the shutter speed is so fast, barely any light is getting in, so I had to bump the ISO WAY up, which causes the photo to be grainy.
After we were done playing in the sink, the assignment was to use your manual setting and your light meter to find a good light balance, becuase as you can see from the (bad) photos above, the light is the most important element.
Below, once again, is Papa P. He will probably be a regular feature. He holds nice and still. (click over to Kate's site and see who HER regular feature is!)
After doing the assignment, I experimented indoors and out to find a good balance of light.
Inside: Slow shutter, high ISO
Outside: Fast shutter / low ISO
So, what I have decided is that I need more practice, especially with moving objects, as the shutter speed will change a lot when the movement changes a lot.
Have you experimented with different shutter speeds?
Have you used the manual setting on your camera?
Join us next week for Week Three: The Color of Light


